Write your First terraform configuration script

Hello Everyone, today am going to tell you about terraform which is an infrastructure-as-code software tool using terraform we will be launching our first script and observing how to terraform works.
before getting started let's be aware of terraform ...
what is exactly terraform?
Terraform is an IAC(Infrastructure as a code) tool, used primarily in DevOps practices to automate various infrastructure tasks. The provisioning of cloud resources, for instance, is one of the main use cases of Terraform.
What is Infrastructure as a code?
Infrastructure as code is the process of managing and provisioning computer data centers through machine-readable definition files, rather than physical hardware configuration or interactive configuration tools.
advantages of terraform ?
terraform can manage multiple clouds
terraform is a human-readable configuration language (HCL = Hashicorp configuration language)
terraform's state allows to track resource changes throughout the deployment
Basic of writing terraform script :
<block> <parameter>{
key1 = value1
key2 = value2
}
terraform basic commands :
1. terraform init : initialise your terraform
2. terraform validate : validate & check your script
3. terraform plan : execute a plan for your specified script
4. terraform apply : apply your plan
Let's create our first terraform file in some simple steps :
- Step 1: for creating terraform files we are using AWS Cloud which is pretty well structured. ( if you are new to DevOps and want to know more about AWS Cloud please check this link.)
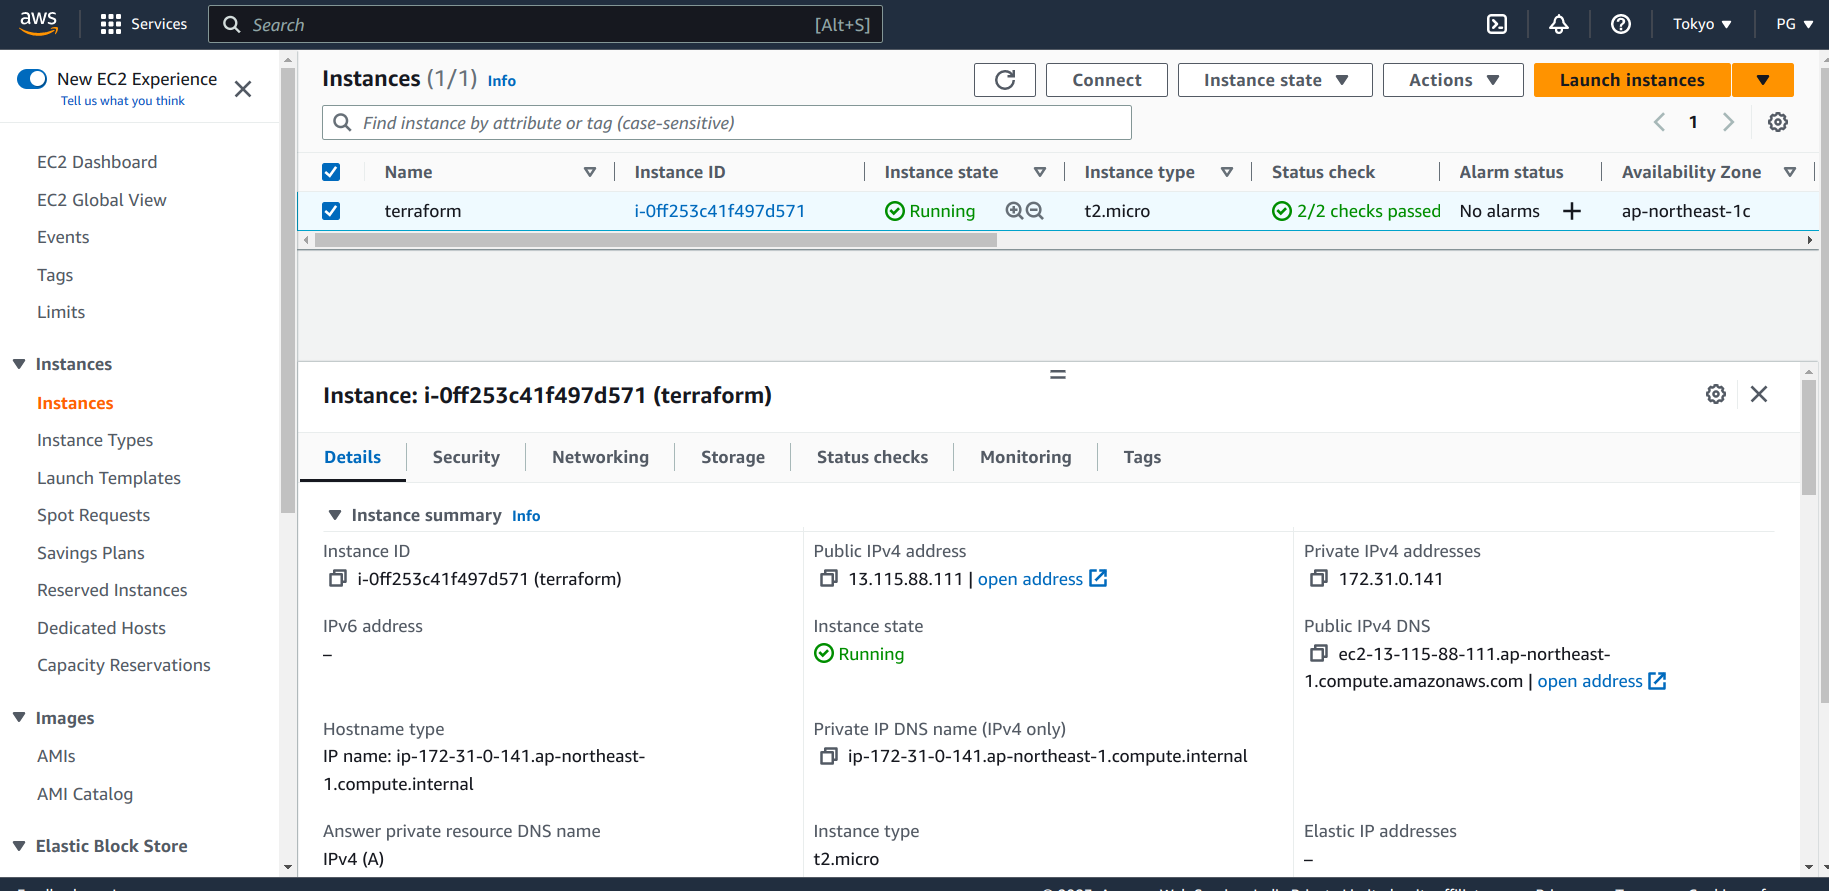
let's create one instance on EC2 : AWS console > EC2 > Launch instance
Name : "give your preffered name"
Application and OS Images : ubuntu
keypair : you need to create one if not exist
Instance type : t2.micro free tier
Allow SSH traffic : tick the box
Allow HTTPS traffic from the internet : tick the box

and click launch instance , wait for few minutes your instance will be ready to check-in
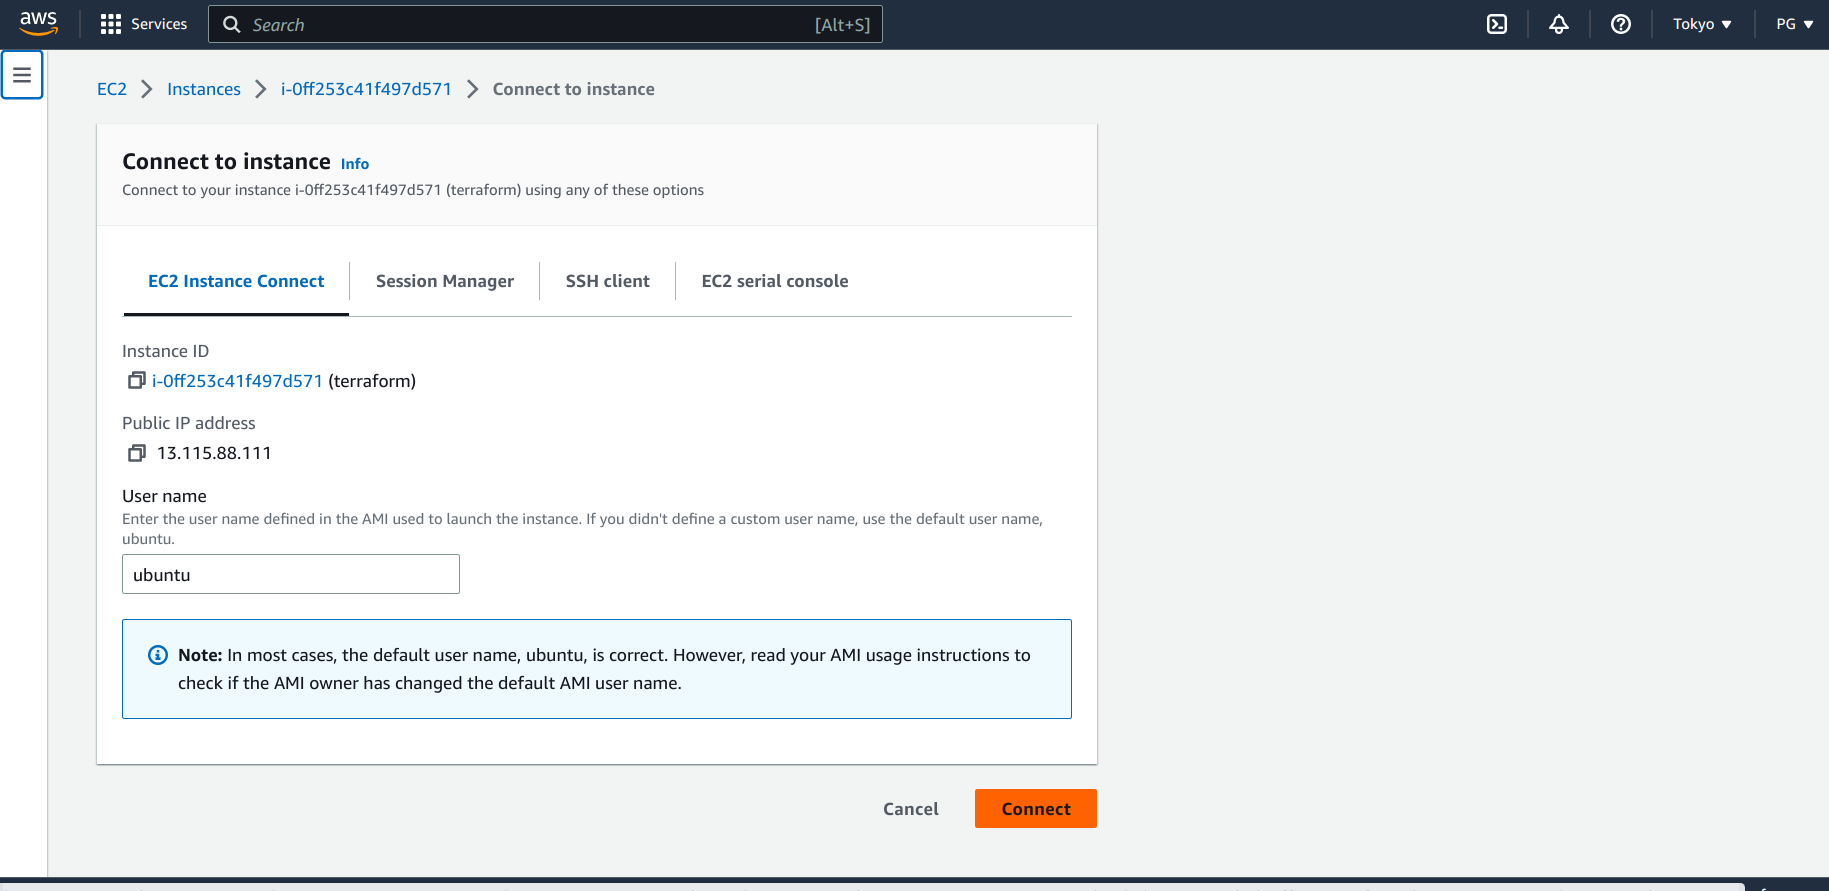
Step 2: let's connect to the instance and explore: select your ec2 > click connect above > choose aws cli
let's install terraform on EC2 first:
steps for installation :

step 1 : sudo apt-get update && sudo apt-get install -y gnupg software-properties-common
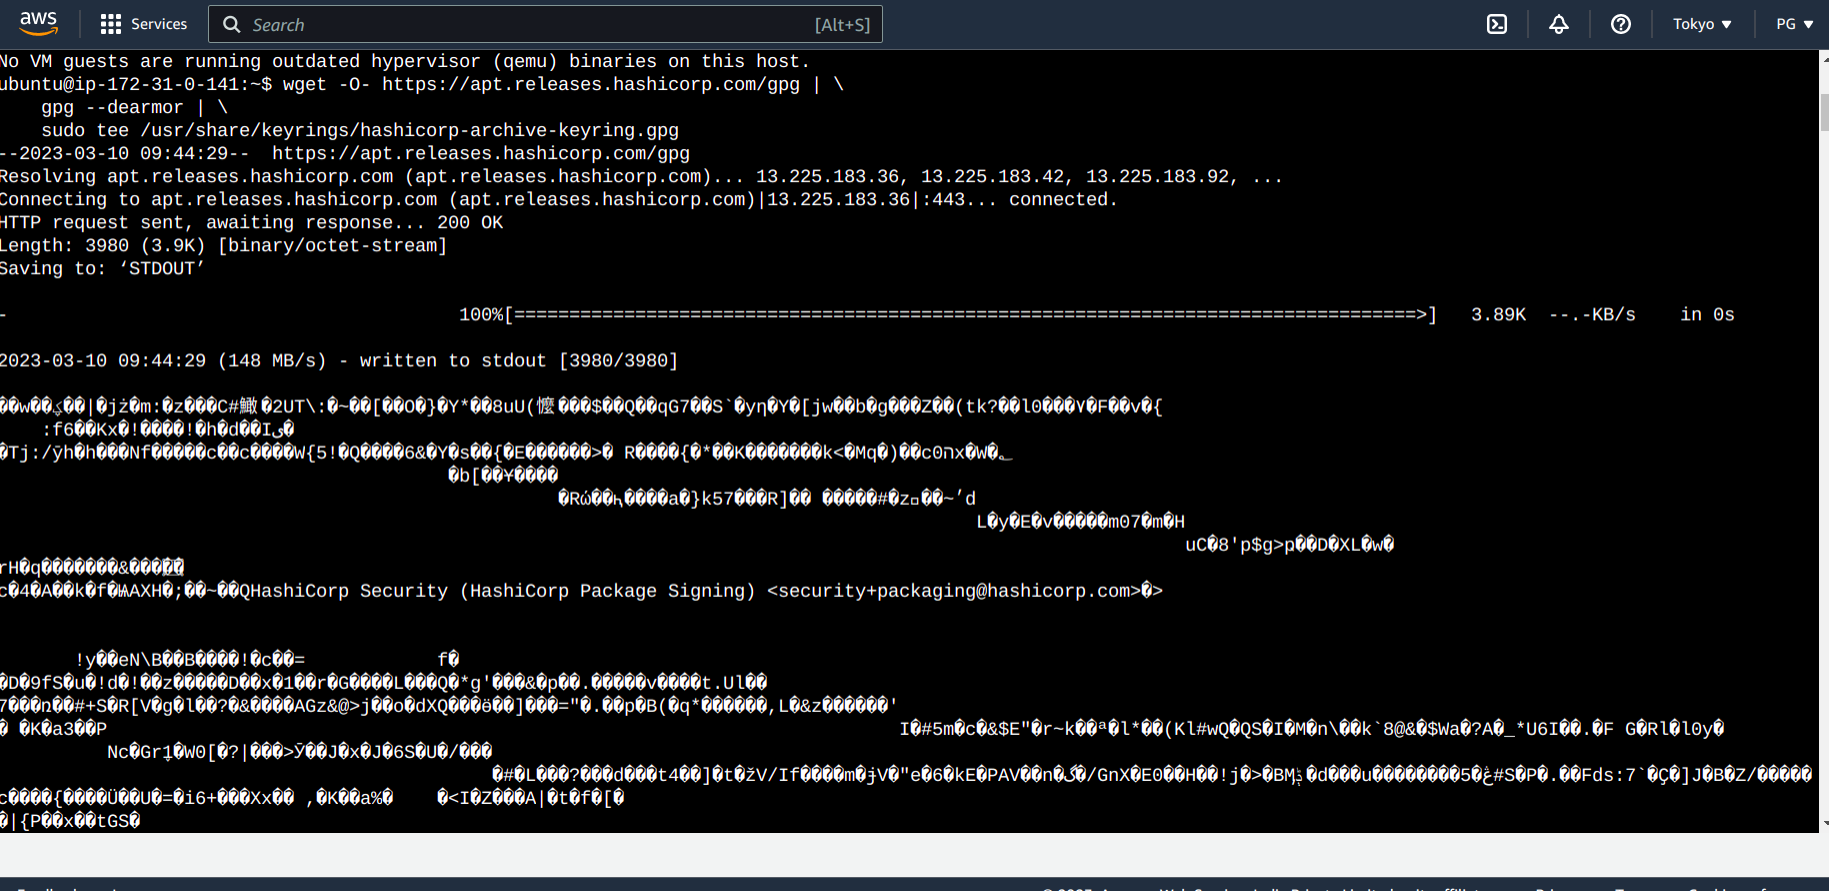
install GPG key from hashicorp:

step 2 :
 wget -O- https://apt.releases.hashicorp.com/gpg | \
    gpg --dearmor | \
    sudo tee /usr/share/keyrings/hashicorp-archive-keyring.gpg
verify key's fingerprint :
step 3 :
gpg --no-default-keyring \
    --keyring /usr/share/keyrings/hashicorp-archive-keyring.gpg \
    --fingerprint
step 4:
echo "deb [signed-by=/usr/share/keyrings/hashicorp-archive-keyring.gpg] \
https://apt.releases.hashicorp.com $(lsb_release -cs) main" | \
sudo tee /etc/apt/sources.list.d/hashicorp.list
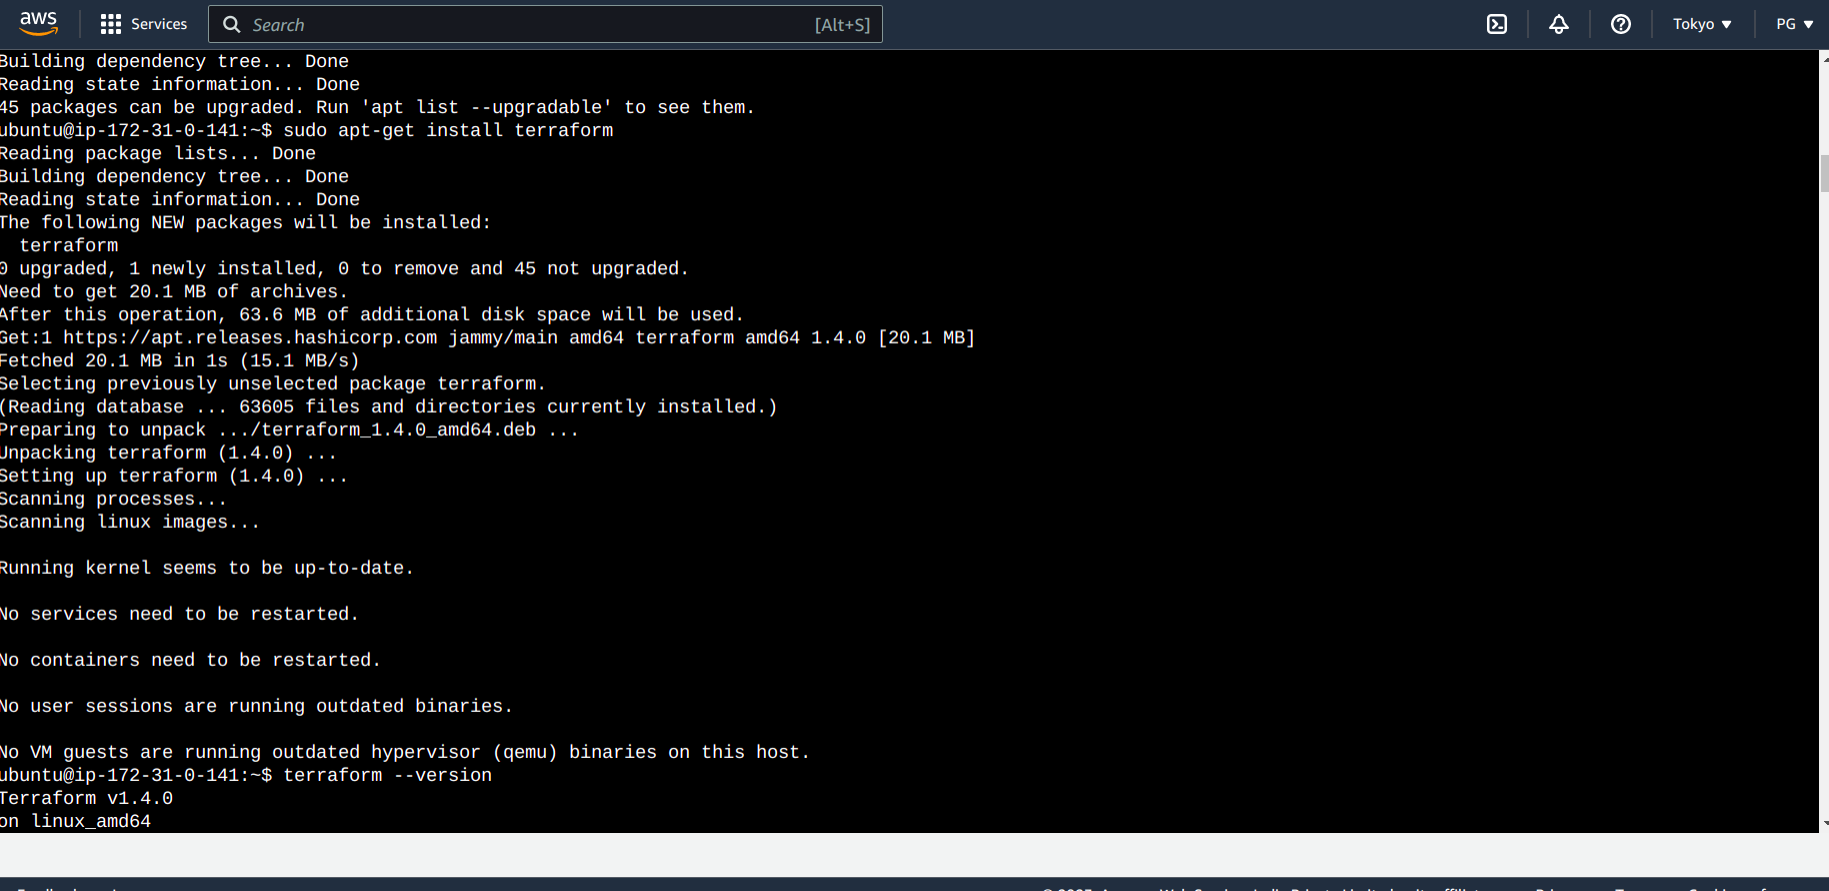
step 5 : sudo apt update
step 6 : sudo apt-get install terraform
step 7 : verify the installation using command terraform --version

step 3: Now let's create a script using terraform :
firstly create a directory using mkdir terraform-day-1 && cd terraform-day-1 and under that directory make another directory mkdir terraform-local in this folder create a script using vim local. tf as I will be using it locally.

for future purposes let's take the present working directory path as well using pwd command as mentioned in the above pic.
adding code in local. tf
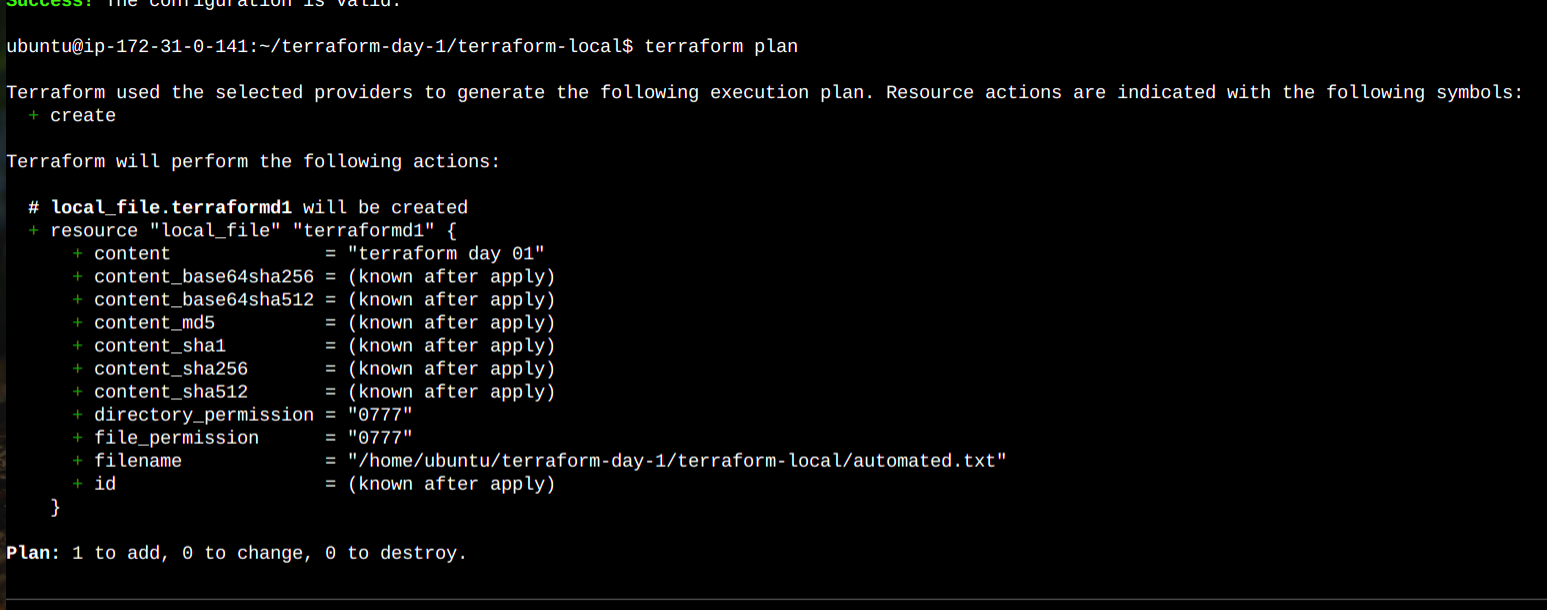
        resource "local_file" "terraformd1" {
        filename = "/home/ubuntu/terraform-day-1/terraform-local/automated.txt"
        content = "terraform day 01"
}

NOte : resouce name is terraformd1 as described local_file that will be funtionable in local env
filename described as pwd/outputfilename
content that will be tested sentence

now get back to the terminal using the press ESC key and :wq enter
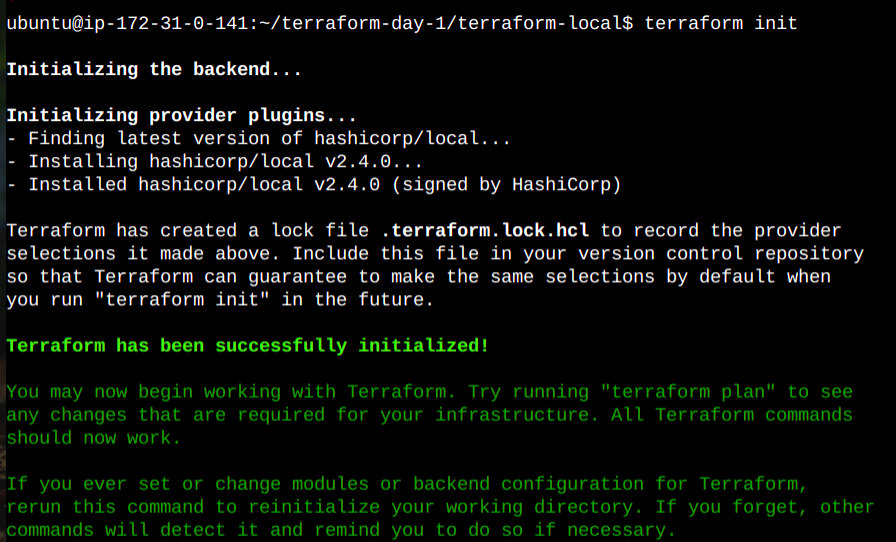
step4: next step is to initialize terraform using the command :
terraform init
Now let's validate our code using :
terraform validate

step5: now we will be creating an executing plan using
terraform plan
step 6: let's execute the actions proposed in a Terraform plan using
terraform apply
using this apply command automation we will be able to see out output.txt file with specified content.
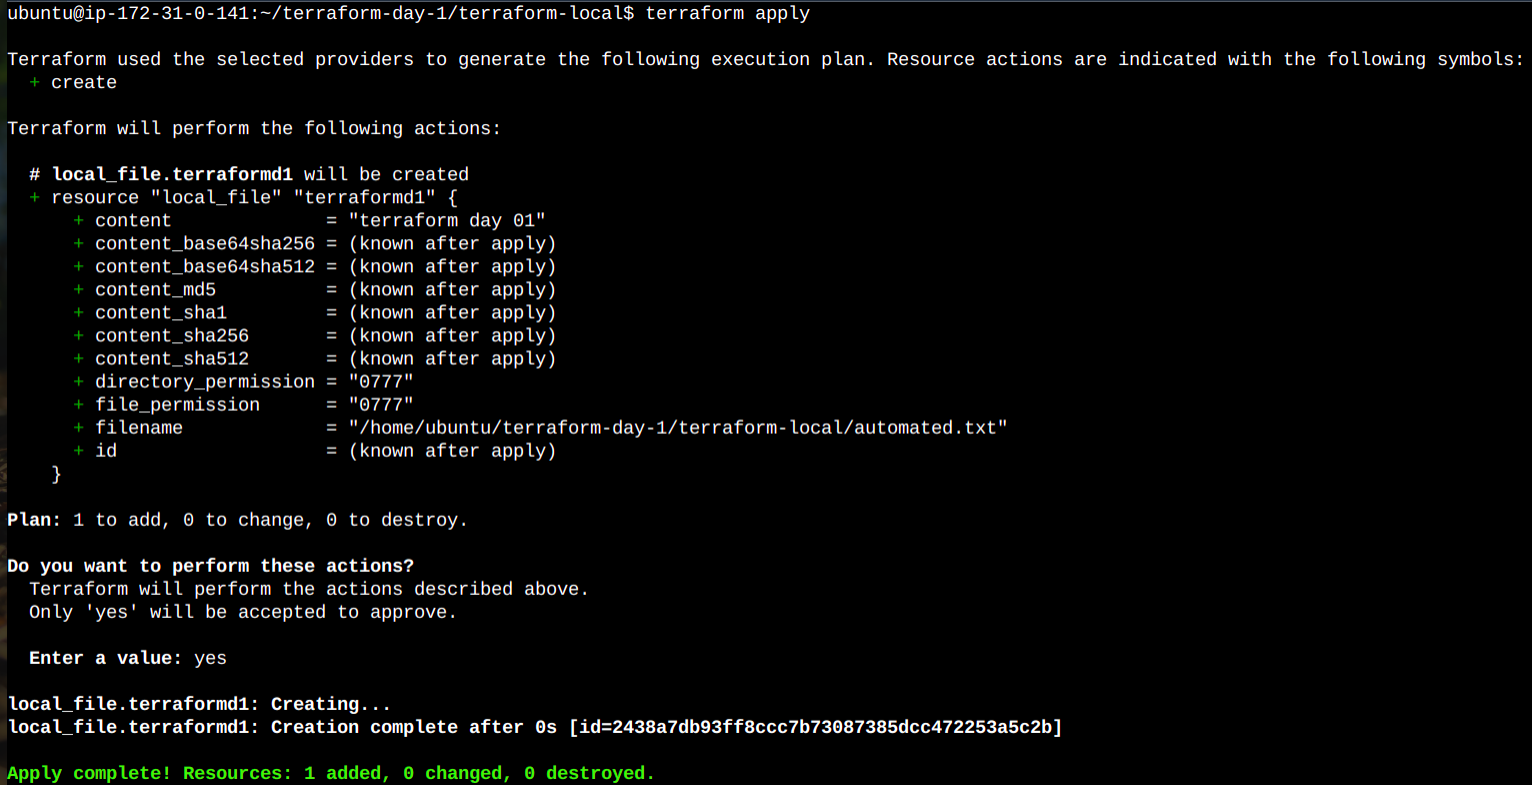
our output file: automated.txt and content should be "terraform day 01"
and here is our file with output file with the exact specified line.

if you found this blog useful hit the like button.
let's spread the DevOps culture.


