

Table of contents
Hello Everyone, Welcome to this AWS Pipeline DevOps blog! In today's fast-paced and rapidly changing world of software development, it's essential to adopt DevOps practices to achieve faster, more reliable, and more efficient delivery of software products. AWS Pipeline DevOps is a set of practices that combines the power of Amazon Web Services (AWS) and DevOps to streamline the software delivery process.
This blog will take you through the journey of an AWS Pipeline DevOps project so let's get started.
Problem statement :
In this project, I have tried to make a CI / CD pipeline of a sample calculator app.
Note: I have deployed a sample calculator app on AWS cloud using code-commit & through buildspec.yml & appsepc.yml file we will build our code using aws code build and using code deploy will deploy our calculator application using CI /CD pipeline on ec2 instance.
before getting started let's understand what is AWS CI / CD Pipeline.
AWS CI/CD Pipeline is a set of practices that enables developers to continuously and automatically build, test, and deploy their software applications on AWS, ensuring faster and more efficient delivery of software products.
What is buildspec.yml file ?
It is a configuration file used by AWS CodeBuild to define the build and deployment steps (build and deployment process, including dependencies, run tests, and package the application for deployment. )for a project.
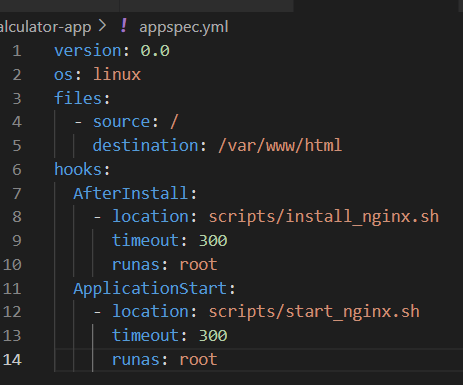
What is appspec.yml ?
It is a file used by AWS CodeDeploy to define the deployment instructions for an application.
Services required: IAM (user, roles, permissions), CodeCommit, Artifact(S3 bucket) CodeBuild, CodeDeploy, Pipeline
Steps :
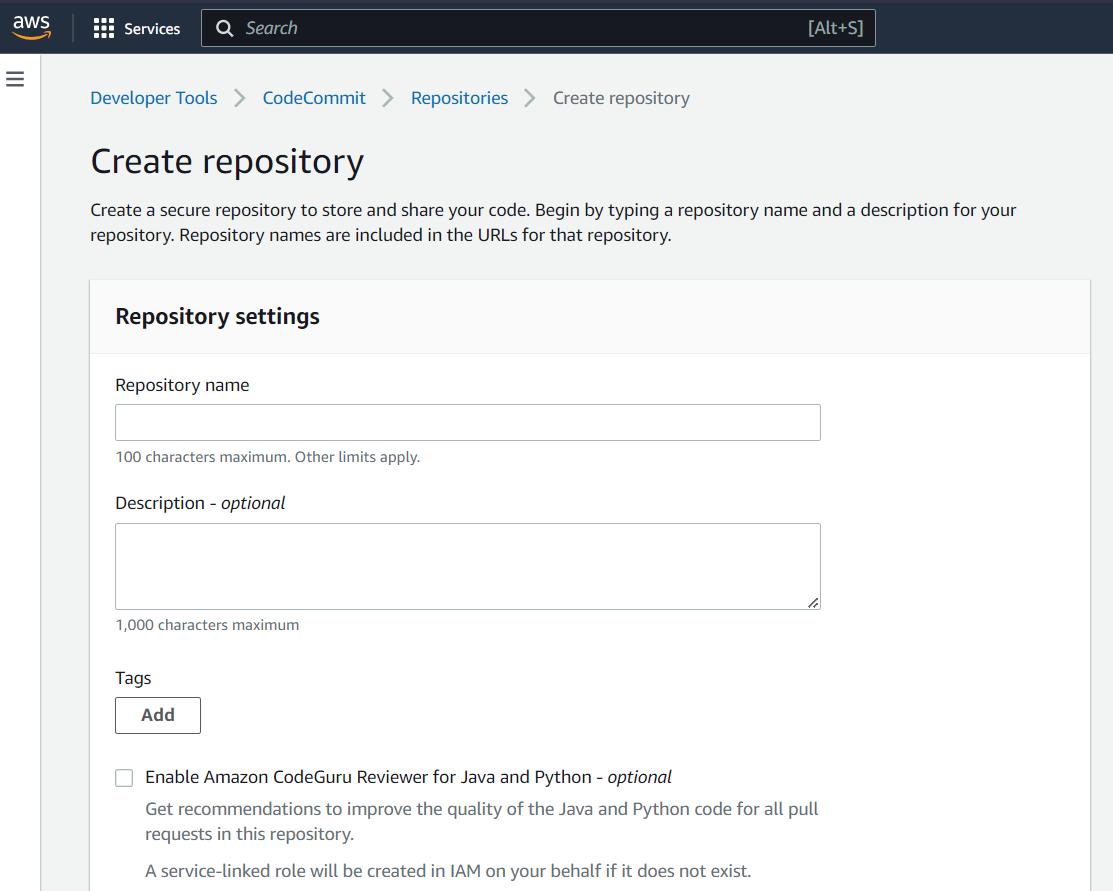
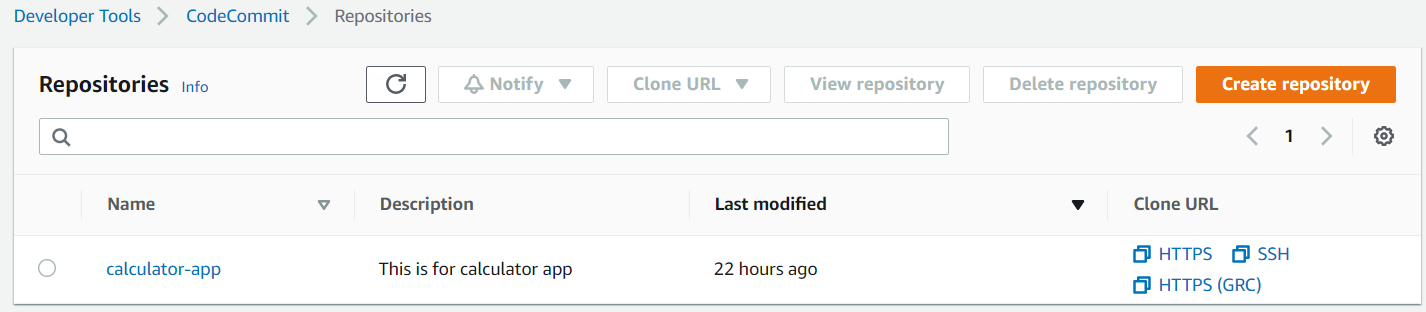
- First of all, we need a repository where we will have our application & build spec, app spec files, for that aws > code commit > repository > create New repo
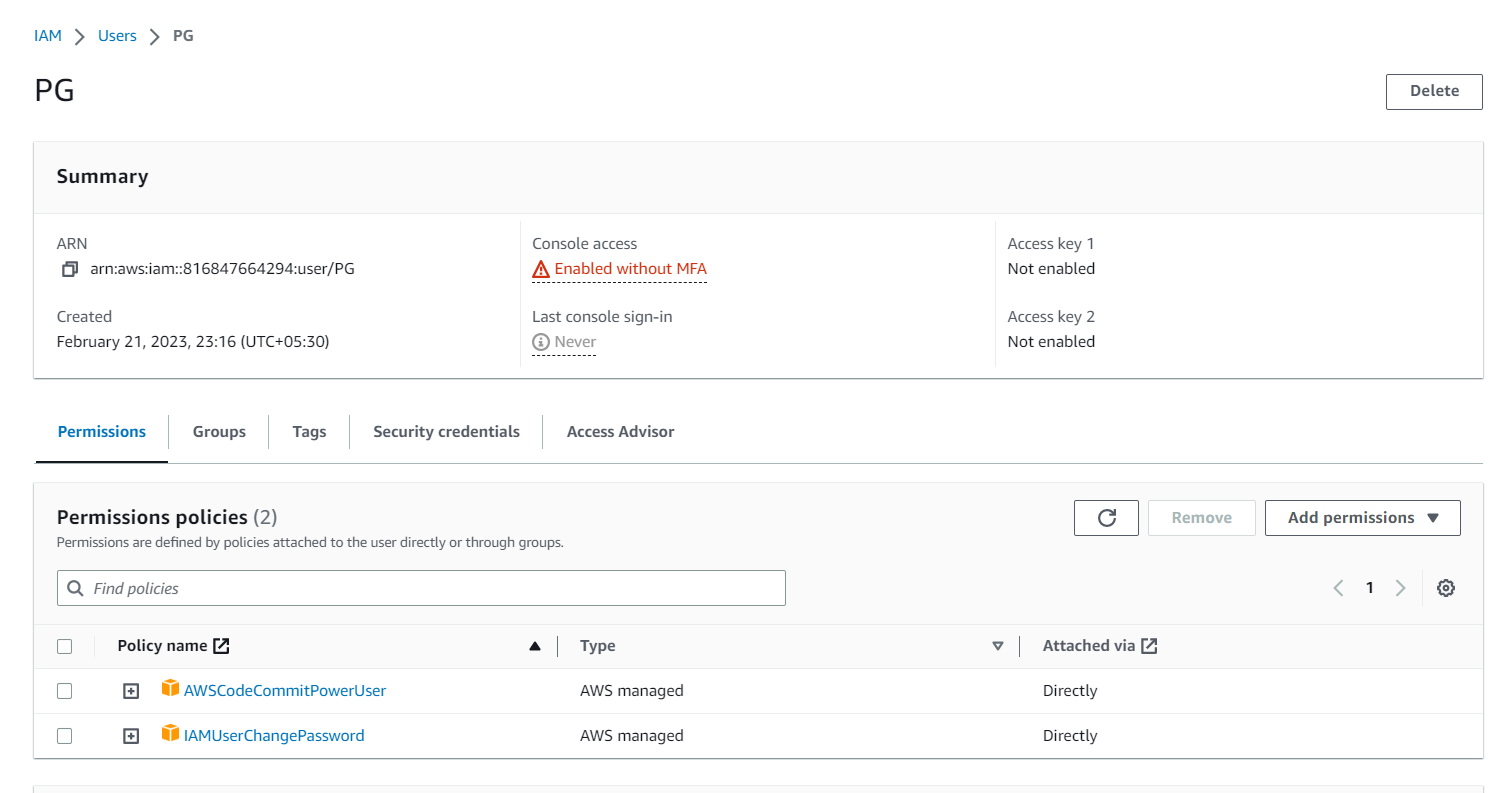
- Now a repo has been created and we need to make this repo on the local system to add our application and configuration file. For that let’s create a user which will access this repo locally. aws > services > IAM > user > create user
Note: Added AWSCodeCommitPowerUser permission to commit in this master repo from the local system.
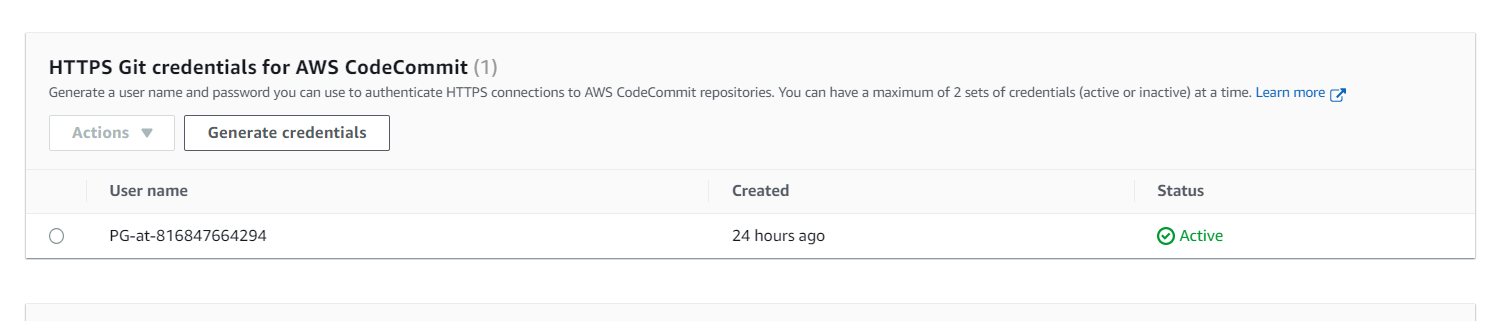
- Let’s generate code-commit credentials to make changes to this repo .
IAM > user > created User (in my case PG as you can see in the above pic) > security cred > HTTPS Git credentials for AWS CodeCommit > generate
Let’s clone this repo locally for that codeCommit > repo > Clone Url > Clone HTTPS > git link
Open any IDE and make a directory-integrated terminal and clone this repo :
git clone <repo link>, it will ask for the username and password that we have generated on user credentials.


- Let’s add our application file along with the configuration file and commit into aws Inside the folder on the local machine create an
index.htmlfile,buildspec.ymlandappspec.ymland some nginx script files through that our application will run up.


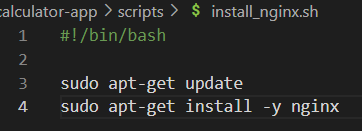
install_nginx.sh(script that will install all dependencies as per our application)

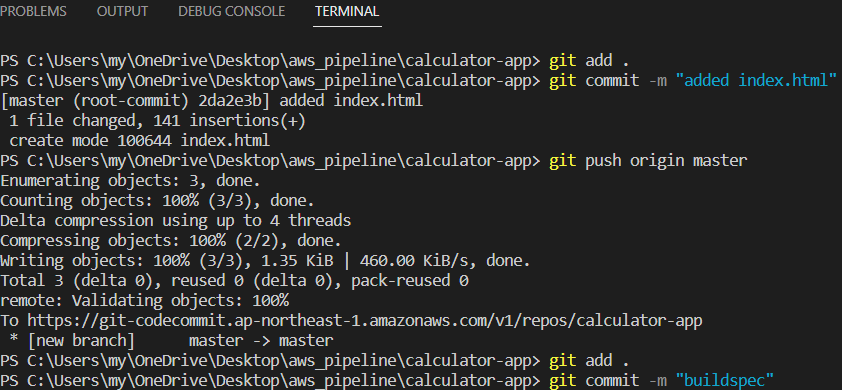
Let’s commit all files into the repo using the following steps :
Git add .( adding all files into the staging phase )Git commit -m “added all files”( commit version with the specified message )Git push origin master( since our repo has master branch )

8. It is time to build our code manually to check whether it is working or not. for that aws > codeBuild > build projects > specify your all details like code will come from aws codeCommit > build now

As you can see my code build status is successful.
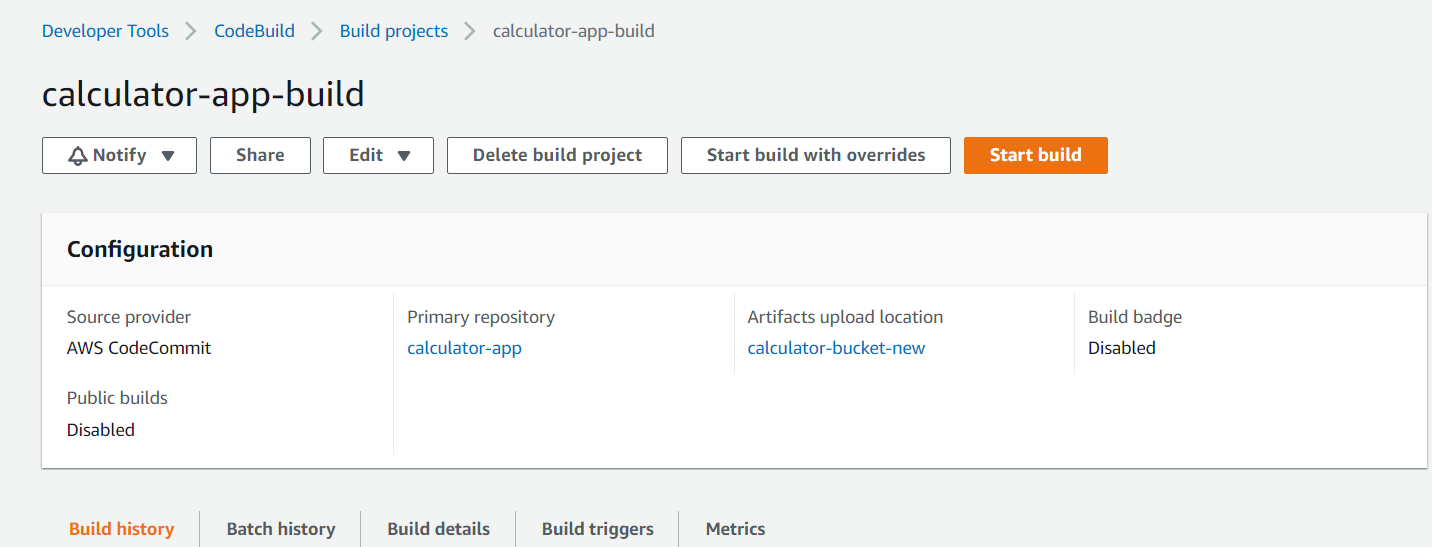
Here I have specified artifact location as well which is the s3 bucket where my zip file will generate (basically my application image will be generated)
9. Now let’s make a deployment group and deploy our app. So a deployment group is needed to run up our deployment.

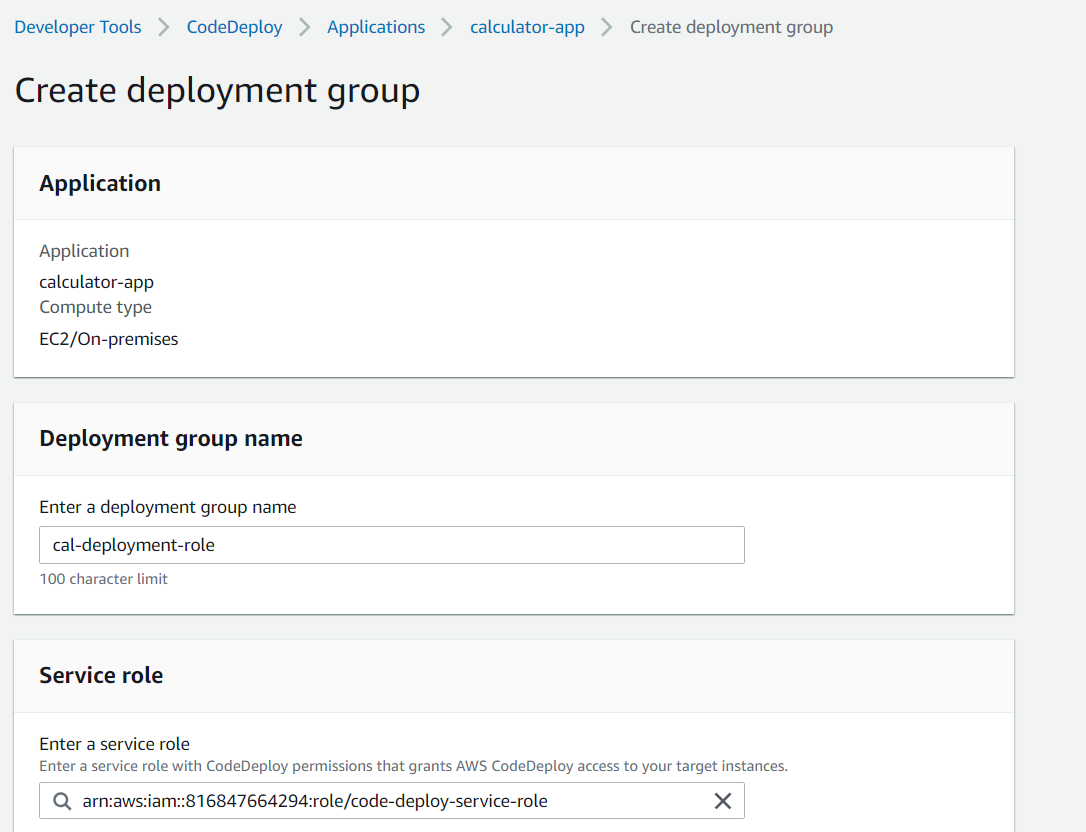
Here I have created a deployment group with a code-deploy service role where all permission is provided in this service.

Provided my ec2 instance as well where we will deploy our application.

- Now let’s create an ec2 application and install the agent manually on the instance for that :
Aws > ec2 > launch instance > ubuntu > t2.micro (free tier) & we will run a script with the specified region in my case it is Tokyo which is ap-northeast-1

Ec2 instance running and up (t2.micro)
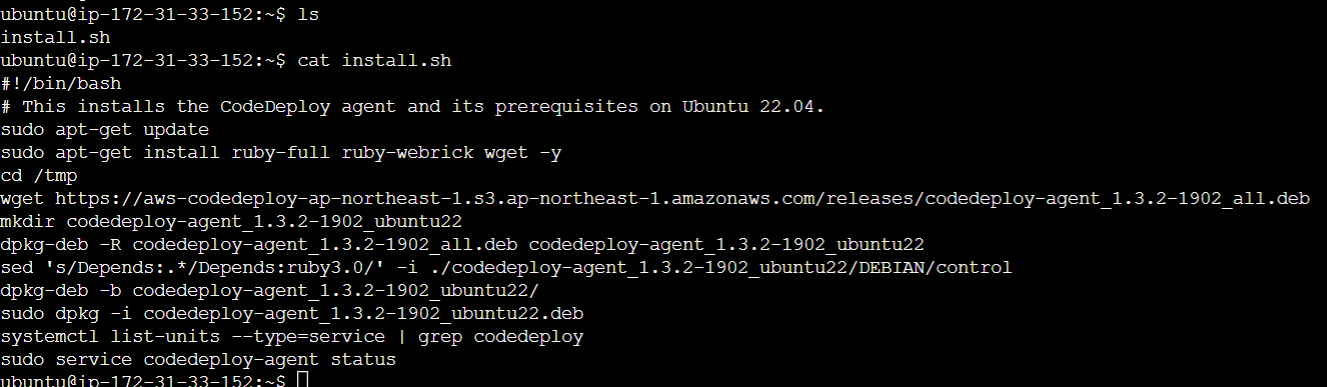
This is the script for installing an agent on ec2
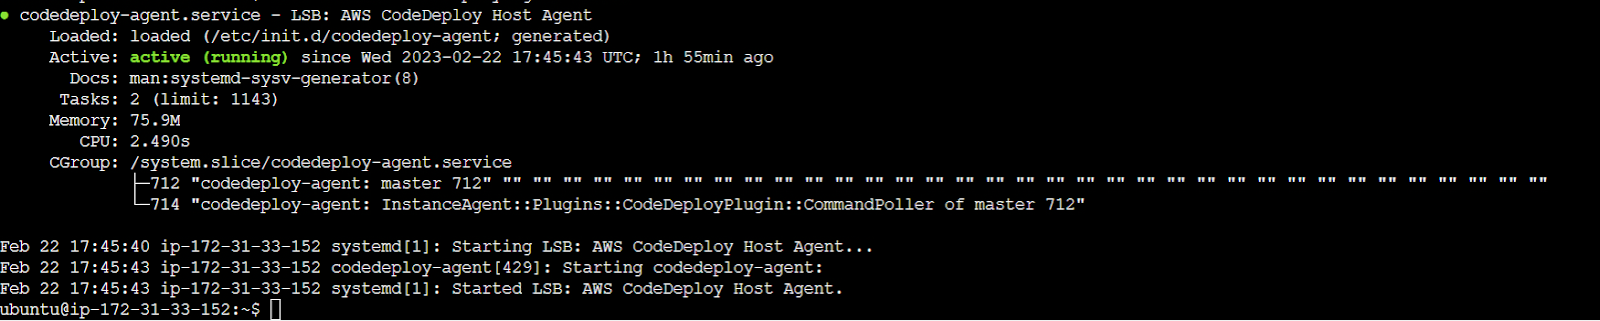
And here is our agent running and active
11. Let’s make a deployment :
Aws > code deploy > application > create deployment
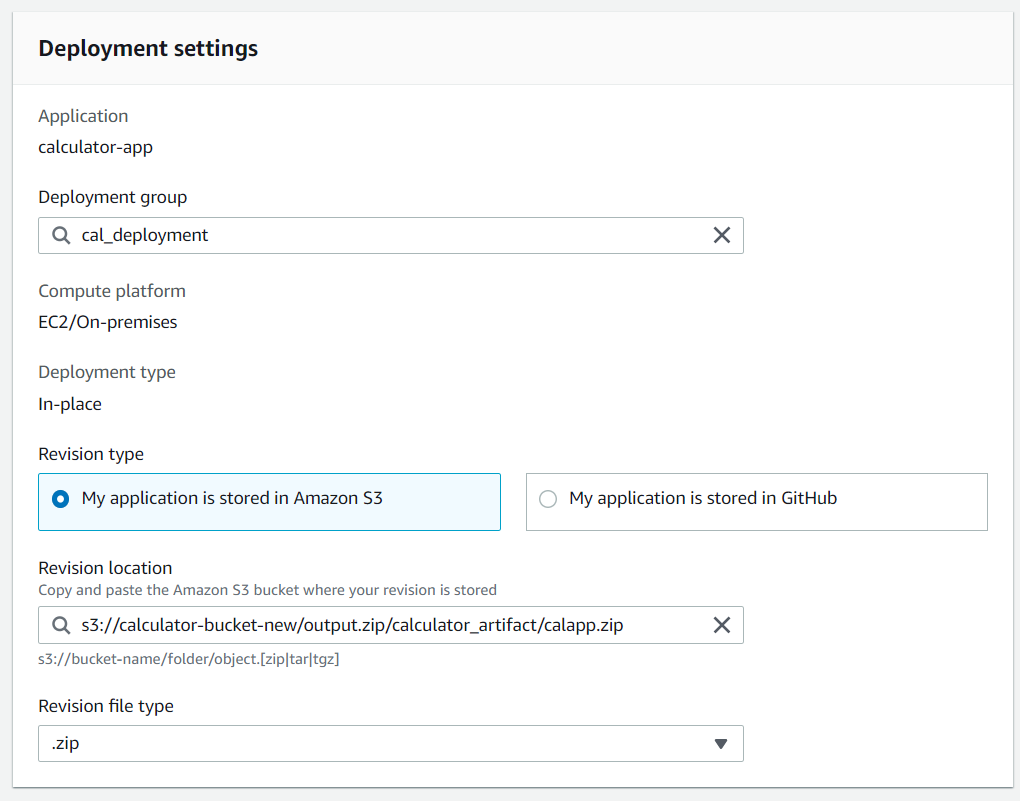
I have specified my artifact location and deployment group which we created earlier.
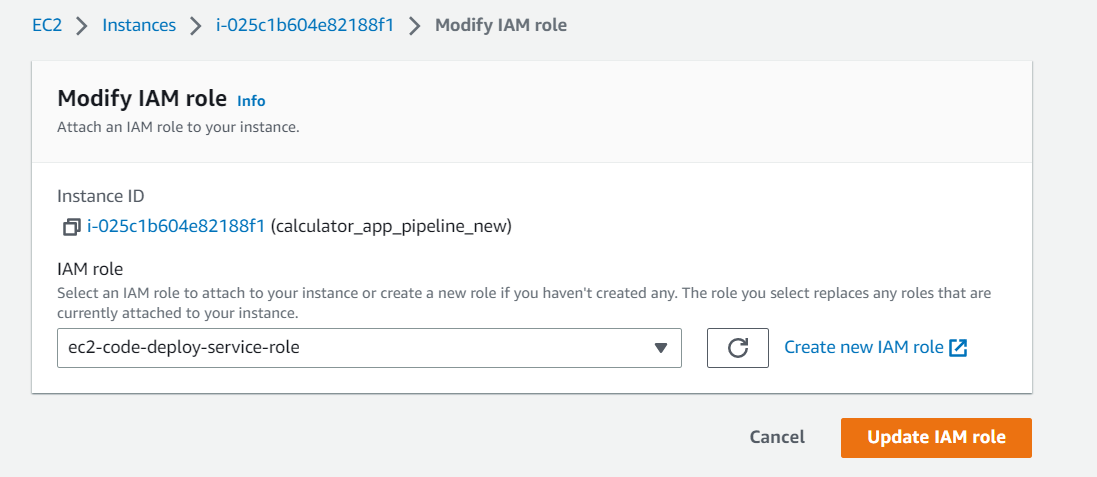
Now we need ec2 code to deploy service role to install all into the deployment
Ec2 > select instance > security > modify iam role > chose ec2 code deploy role

Now installation completed :

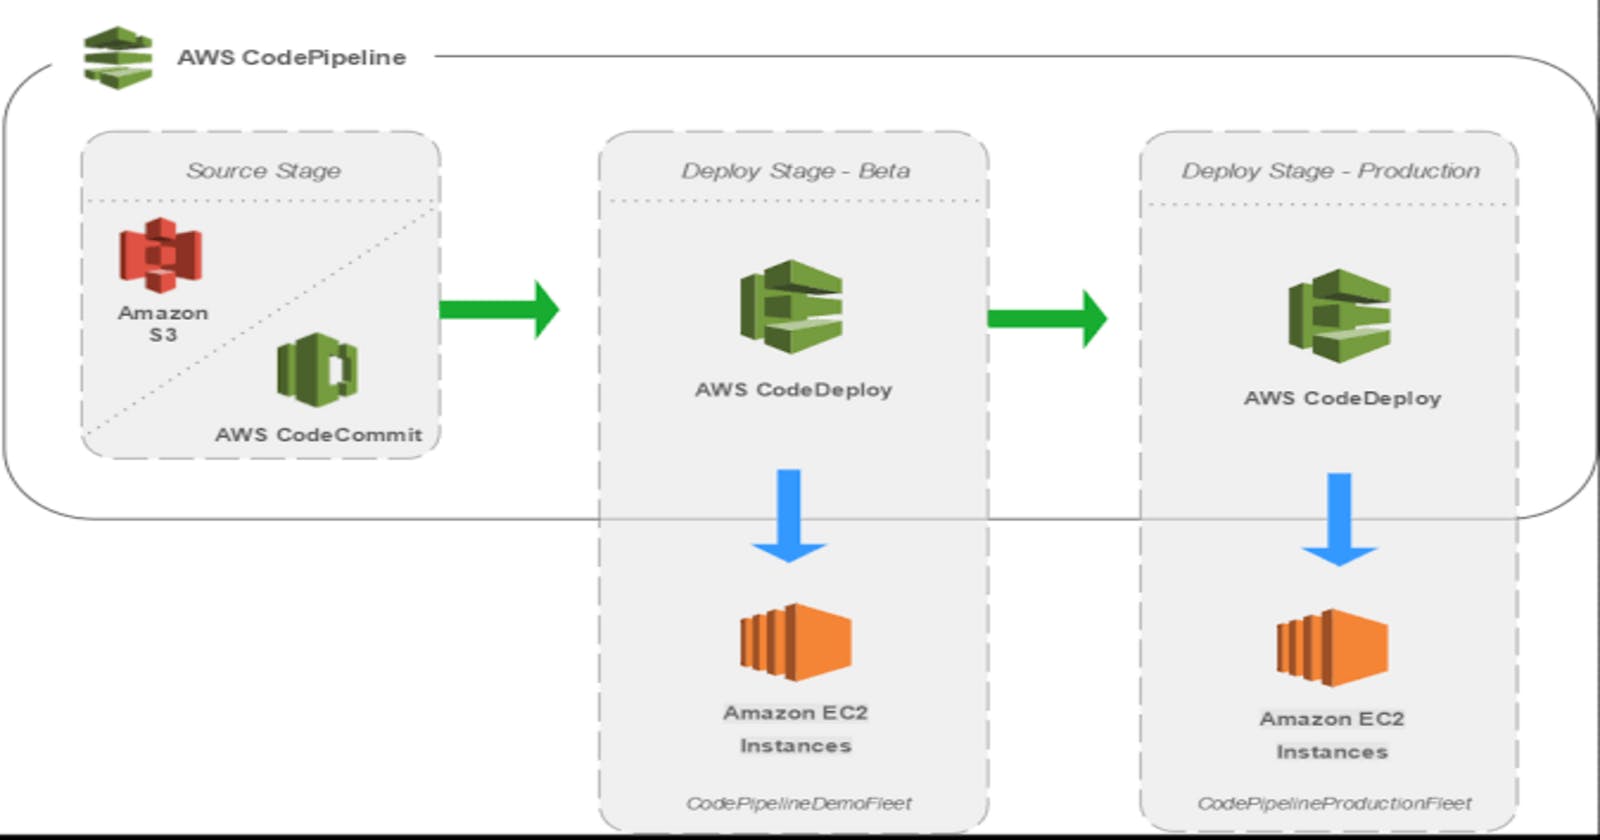
- Now let’s create a CI / CD pipeline into aws pipeline :
aws > developer tool > code pipeline > create a pipeline which will be source -> build -> deploy

Overall steps in pipeline : source > build > deploy
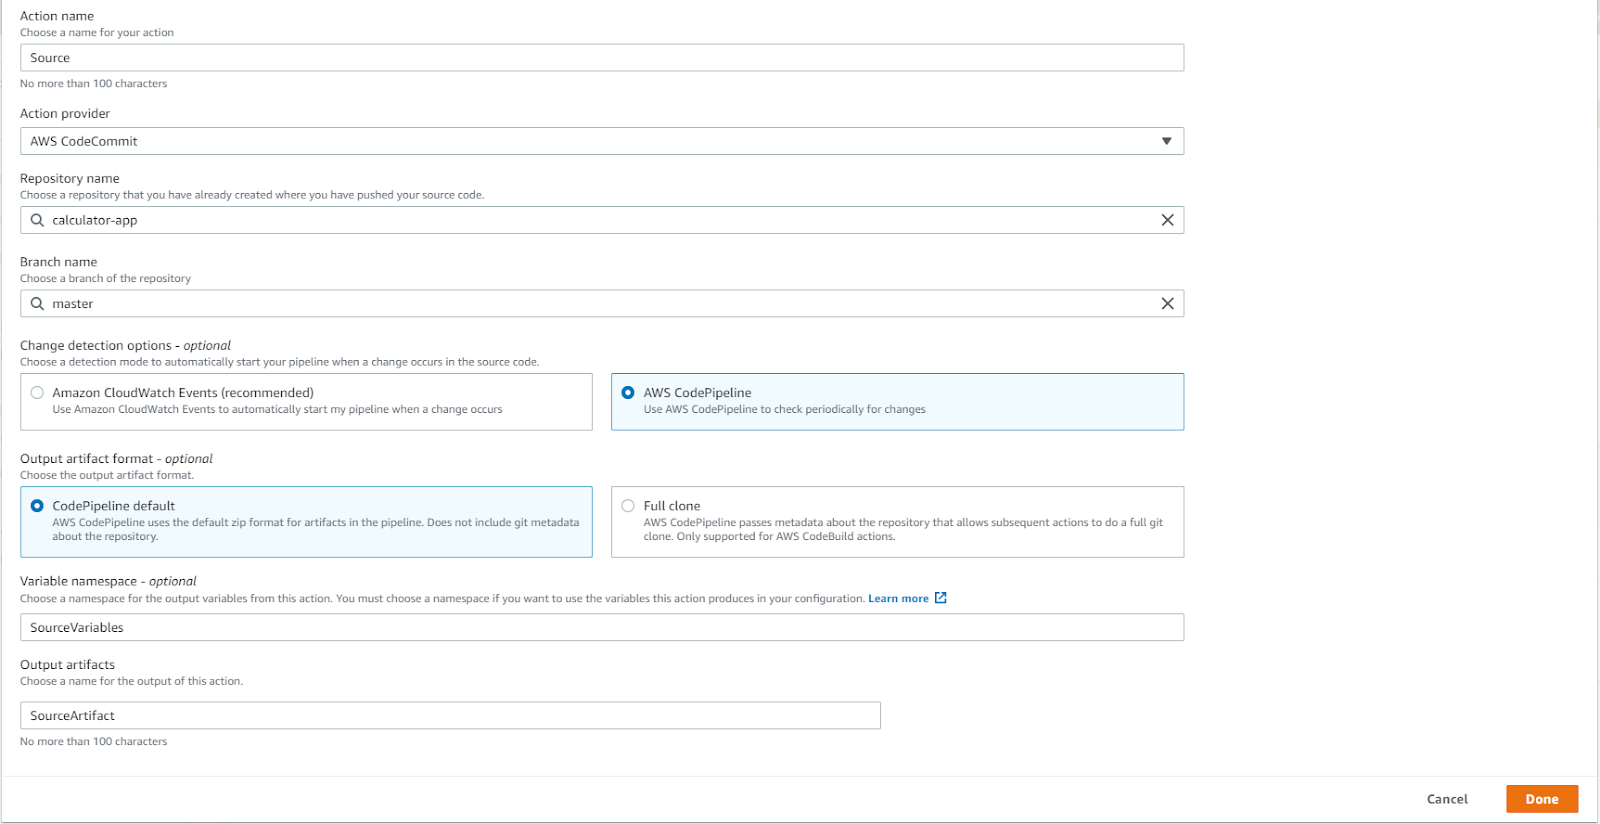
Source step

Build step
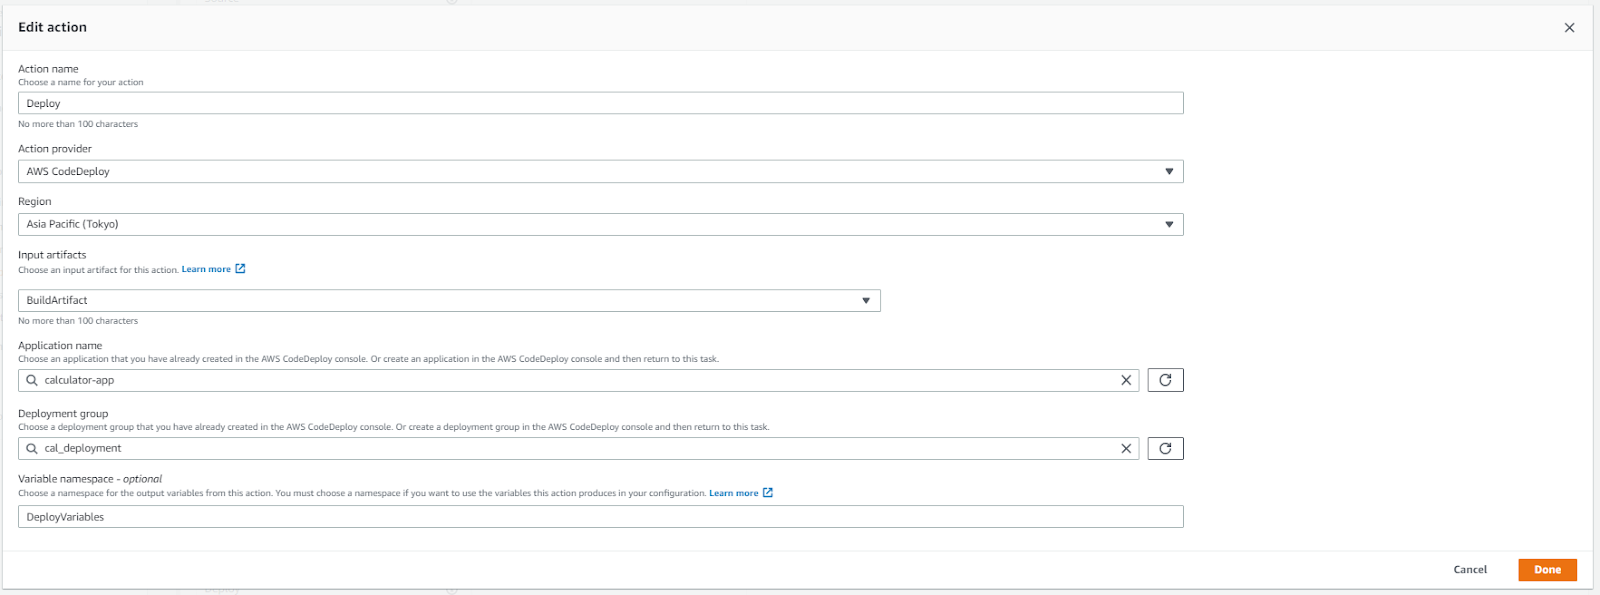
Deploy step
13. Final step let’s build our CI /CD pipeline automation :
Click save pipeline settings > start build and it will start automatically and in background it will tell us build process , steps and etc

Our pipeline is succeeded it means our all code successfully passed .
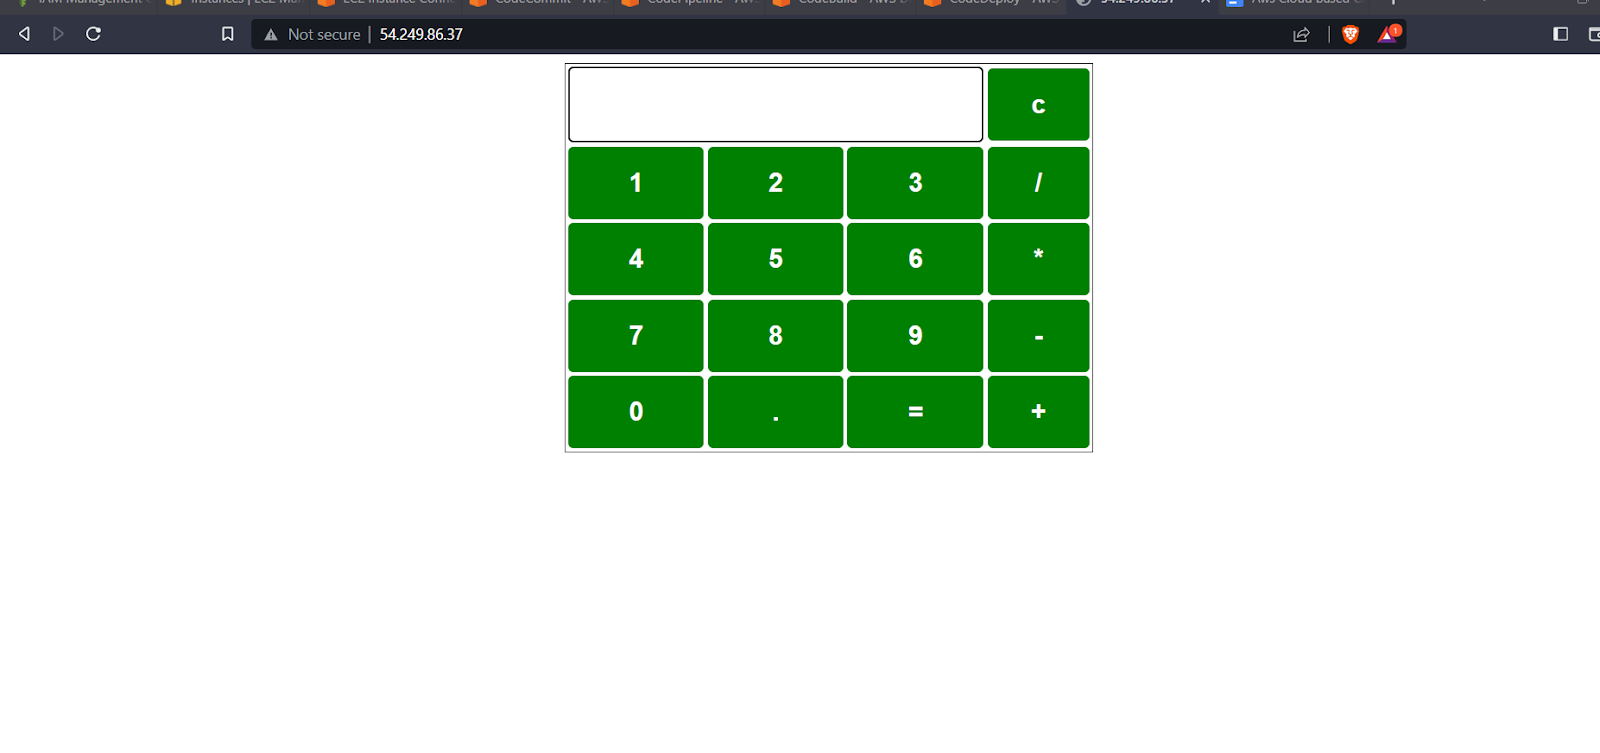
Now let’s check our ec2 instance public IP our calculator app should be running :

Our ec2 public ip is 54.249.86.37 so hitting this ip into browser our calculator app running successfully